800.443.4421
Professional, Fast, Affordable
Accent Edged Mount Boards
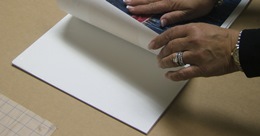
Ready to Display Peel and
Stick Boards
More Edge Finishes Choose new Silver or Wood edges in addition to our classic Black and White finishes.
Three Thicknesses of Boards Choose from 3/4", 1" and 1.5" wide boards for the look your want
Custom Edged Boards Available Need a different size or finish, call us for a quote.


Pouch Board Mounting
and Laminating System
The easiest way to mount and laminate a print up to 44" wide. Make Presentation Graphics, Poster Displays, Yard Signs, Counter or Window graphics and more. Insert your print in a pouch, process in the Phoenix and display.
Presentation Graphics
Mounted Displays
Mounted prints are easier to read and give a presentation impact. Use our adhesive coated boards for your next meeting, tradeshow or training session. Choose from a wide variety of boards from Letter to Mural size.
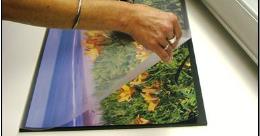
Photo Mounting
Professional
Display your prints. Choose from Ready to hang and display edged boards, canvas wraps and Centermount boards or Peel & Stick boards for framing.
Yard & Sidewalk Signs
Quick and Easy
Make custom yard signs from your inkjet prints. Adhere your print to corrugated plastic with our adhesive or pouch boards. Attach a Step Stake and your sign is complete.
Pouch Laminating
Protect & Display
Our Specialty pouches and pouch boards let you mount prints for framing, make sturdy signs and table-top displays. And our new Sign Pouches make counter mats, floor and window graphics with your pouch laminator too.
CenterMount
Peel and Stick Boards
Convert prints into eye catching displays. Professional mat boards with adhesive in the center. Use for photos, color prints and more. Use with ready-made frames or alone with stick-on easel backs.


[Library/themed-object/themed-object.htm]
![]()
Browse Our Product Groups


Foam Boards
We stock a wide range of types and sizes of mounting boards for quick
shipping. Sizes up to 32"x40" are double-boxed to ship via UPS. Key Products include:
► Foam Boards
► Adhesive Boards
► Gator Boards
► Photo Boards
► Sintra and Plastics
Pouch Boards
Adhesive coated boards with a laminate film attached at one end. Pouch
Boards mount and laminate a print in one step with consistent professional results.
Key Products include:
►Heat Pouch Boards
►Cold Pouch Boards
►Thin Pouch Boards
►Gator Pouch Boards
►MountCor Pouch Boards
Adhesives and Films
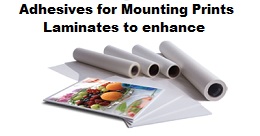
Mounting adhesives are double-sided to adhere prints to boards.
Laminate films enhance the prints appearance with a gloss, matte or textured
finish.
Key Products include:
►
Cold Adhesive Sheets
►
Cold Mount Adhesive Rolls
►
Cold Over-laminate Films
►
Hot/Thermal Laminate Films
►
Dry Mounting Adhesives
Product Categories
Mounting Boards
►
Foam Boards
►
Gator Boards
►
Plastic Boards
►
Self-adhesive Boards
►
Heat Active(HAM) Boards
►
Edged Boards
►
CenterMount Boards
Pouch Boards and Films
►
Hot Pouch Boards
►
Cold Pouch Boards
►
Large Film Pouches
►
Document Film Pouches
Roll Films & Adhesives
►
Hot Laminating Films
►
Cold Laminating Films
►
Mounting Adhesives
Sheet Films & Adhesives
►
Double-sided Adhesives
►
Over-Laminate Films
Specialty Adhesives
►
Dry Mount Adhesives
►
Spray Adhesives
►
3M PMA Adhesive
Accessories
►
Pantone Color Matching
►
Print Display and Handling
Equipment
►
Laminators and Presses
►
Foam Board Cutters
►
Rotary Trimmers
Shipping
We ship via UPS, Fedex and Truck Freight. Charges, if applicable, are added to your invoice however we can also ship using your shipping accounts if you prefer. Charges shown are for standard delivery. Extra services including expedited services are available at additional charge.
Payment Methods

 We accept major credit cards & Paypal. For Government
Purchasers, our CAGE Code is 3BT60 and our DUNS number is 004675869.
We accept major credit cards & Paypal. For Government
Purchasers, our CAGE Code is 3BT60 and our DUNS number is 004675869.
Search our Site
Accent Edged Display Boards
|
3/4" Thick Accent Edged Boards 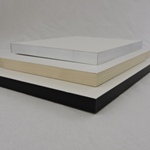 Sizes from 5"x7" to
24"x36"
|
1" Thick Accent Edged Boards 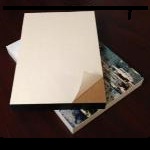 Sizes from 8"x10" to 30"x40" |
1 1/2" Thick Accent Edged Boards 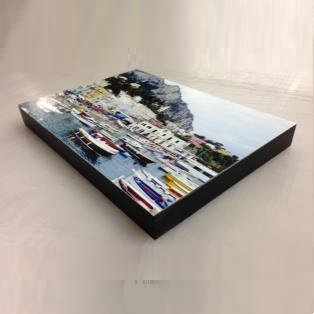 Sizes from 8"x10" to 30"x40" |
|
Black Finish Edged Boards 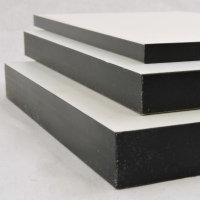 3/4", 1" and 1.5" thick boards |
Silver Finish Edged Boards 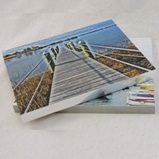 3/4" Thick Boards |
Wood (Maple) Finish Edged Boards 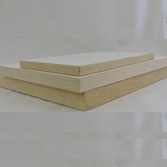 3/4", 1" and 1.5" thick boards |
|
CenterMount Self-stick Boards 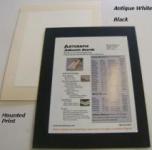 Matboards with centered Adhesive to highlight photos |
Self-stick Mounting Boards 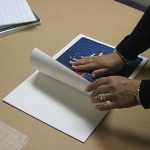 Foam Board, Gator Board, Plastic & 1/2" boards Sizes from 8"x10" to 48"x96" |
Display Accessories  Hanging Hardware, Corner Protectors, Stick-on Easels |
Accent Boards and mounting boards give your print a professional finished look. If you have any questions on any display or products, please call us toll-free at 800.443.4421.
Artgrafix - Serving you since 1986


Copyright 2017. Artgrafix. All Rights Reserved.